Ever wanted to capture something on your iPhone screen, but not sure how to go about it? Screen recording on your iPhone can be incredibly useful for a variety of reasons. Whether you’re making a tutorial, grabbing evidence for tech support, or simply showing off your latest high score in a game, knowing how to record your screen can come in handy.
In this article
We’ll guide you through every step to help you master this feature effortlessly. By the end of this guide, you’ll be screen recording like a pro, ready to share whatever catches your eye on your iPhone. Let’s dive in!
Getting Started with screen record on iphone
Screen recording on an iPhone is a simple and incredibly useful feature that allows you to capture exactly what’s happening on your screen. Whether you’re looking to create a tutorial, save a gameplay clip, or capture a video for future reference, iPhone’s built-in screen recording feature has got you covered. This seamless process can be set up in just a few easy steps, making it accessible for all users.
First, you’ll need to ensure that the Screen Recording function is added to your Control Center – this is the menu that appears when you swipe up or down from the top corner of your screen. To do this, go to your Settings, then tap Control Center and make sure Screen Recording is included in the list of controls.
Related:
How to Easily Turn Off the Flashlight on Your iPhone
How to Easily Turn Do Not Disturb On or Off on Your iPhone or iPad
Once it’s added, starting a screen recording is just a tap away. The Screen Recording icon looks like a solid dot within a circle. When you tap this icon, your iPhone begins capturing everything happening on your screen following a brief 3-second countdown. During this countdown, you can prepare the content you want to record, ensuring you start right at the perfect moment. Your video will be saved directly to your Photos app once you stop the recording.
If you’re ready to dive deeper into the specifics, let’s move on to setting up additional features and tricks for the most efficient screen recording experience.
Setting Up Your Screen Recording Feature
Before you dive into recording your screen, you’ll need to make sure the screen recording feature is added to your Control Center. Here’s how to set it up:
- Open Settings: Tap the Settings app on your iPhone.
- Access Control Center: Scroll down and find Control Center. Tap on it.
- Customize Controls: Tap on Customize Controls. This will bring up a list of functions you can add to your Control Center.
- Add Screen Recording: Scroll down to find Screen Recording. Tap the green + icon next to it. This will add the screen recording button to your Control Center.
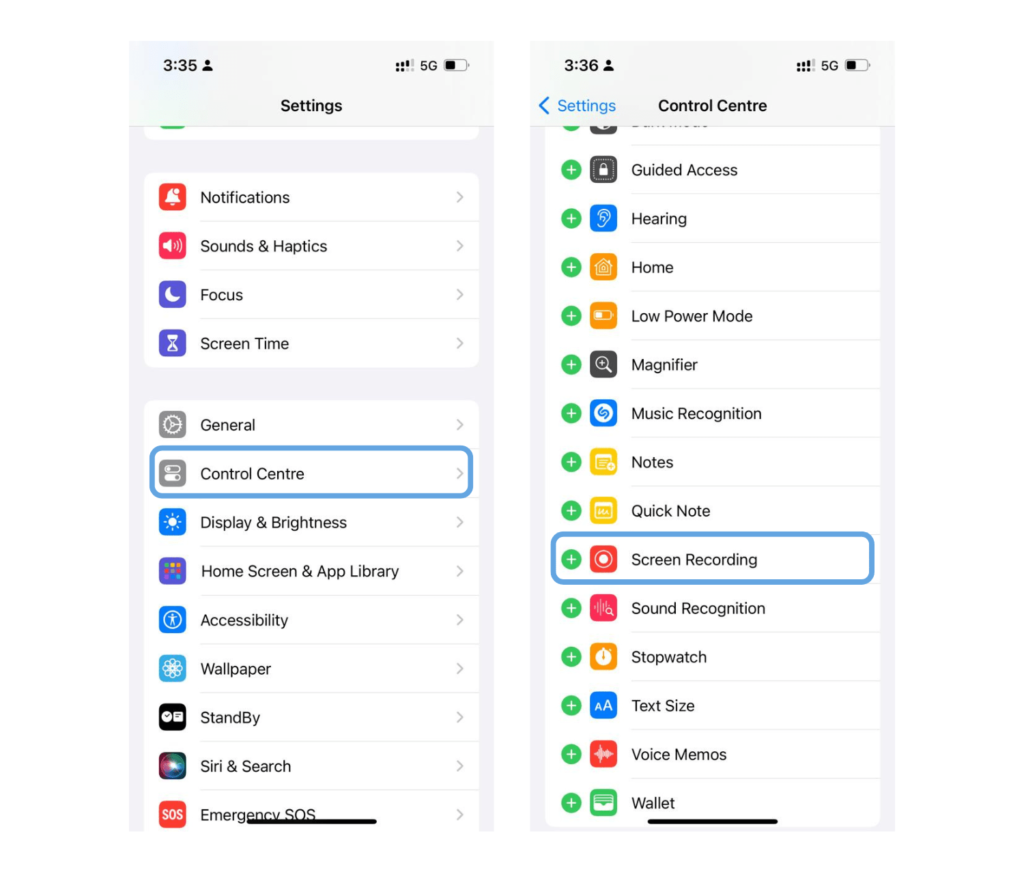
Now you’re all set! The Screen Recording button should be visible in the Control Center. This setup allows you to quickly access the feature whenever you need it.
Starting a Screen Recording Session
Initiating a screen recording on your iPhone is a breeze once you’ve set up the relevant feature in your Control Center. Here’s a step-by-step guide to help you get started:
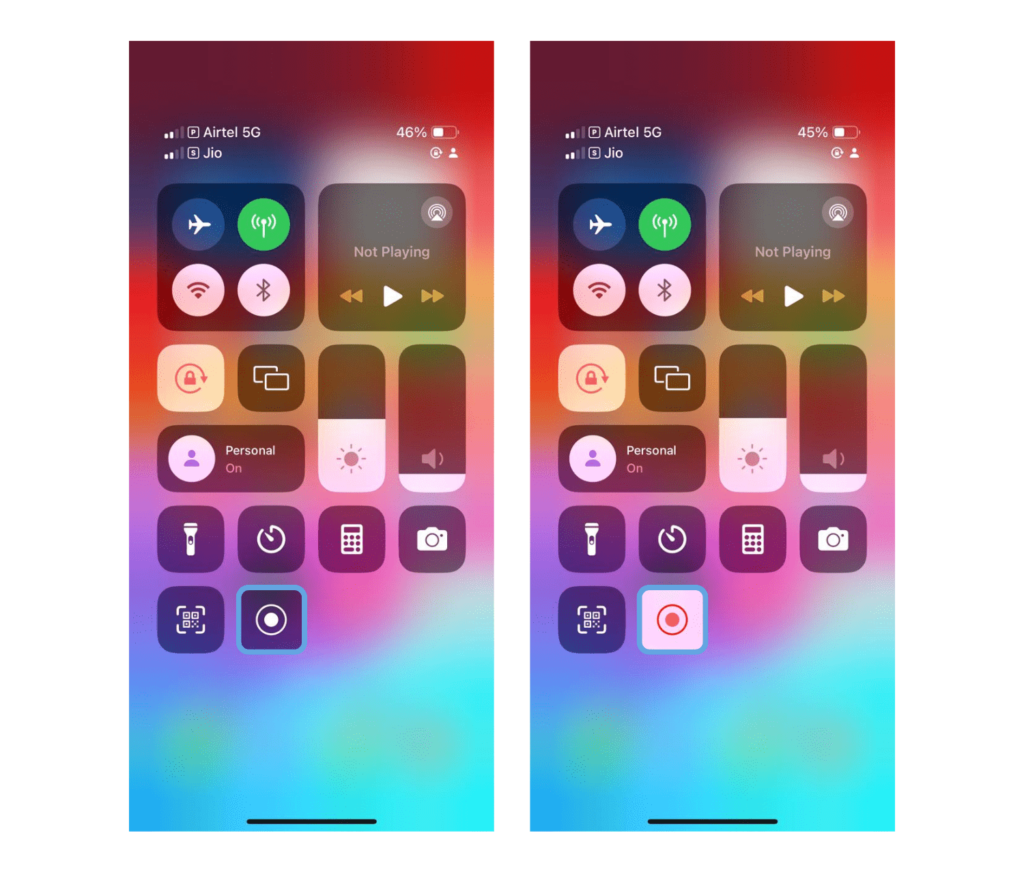
- Open Control Center: On iPhone X or later, swipe down from the upper-right corner of the screen. On earlier models, swipe up from the bottom edge.
- Locate the Screen Recording Icon: Look for a circle with a dot inside. This is the screen recording button.
- Start Recording: Tap the screen recording button. You’ll see a three-second countdown, allowing you to prepare for your recording.
- Recording In Progress: Once the countdown ends, your iPhone begins capturing everything on your screen. You’ll notice a red bar or a red clock on the top of your screen, indicating the recording is live.
If you want to include audio in your recording, take an additional step before tapping the recording button:
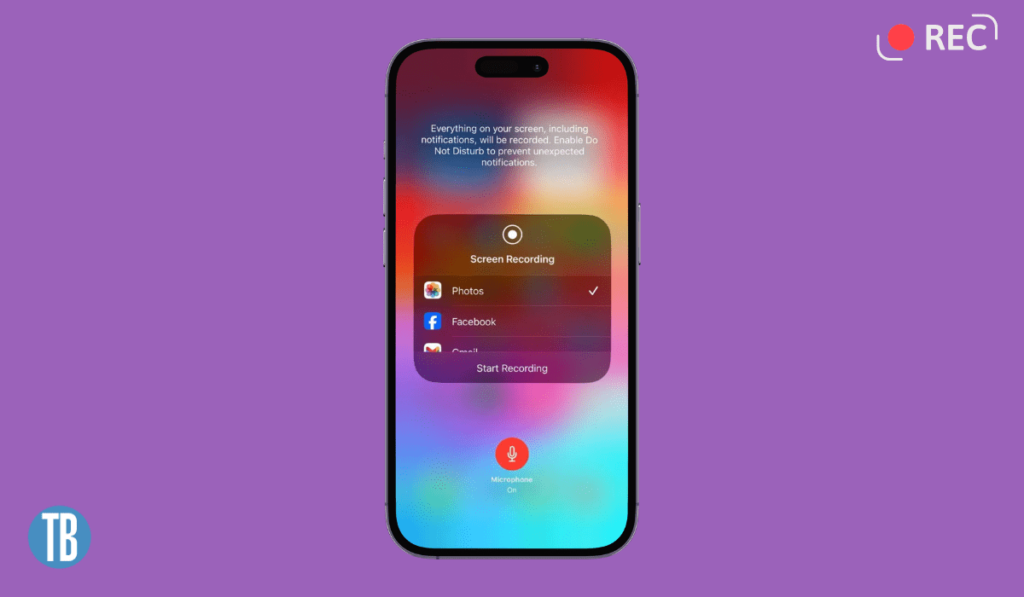
- Enable Microphone Audio: Press and hold the screen recording button until you see a pop-up. Tap the microphone icon to toggle audio on or off.
That’s it! You’re now capturing your iPhone’s screen, including any on-screen actions and, if enabled, surrounding sounds.
Enabling and Disabling Microphone Audio
One key setting to consider is whether you want to record audio alongside your screen activities. This can be especially useful if you’re creating a tutorial or want to narrate what you’re doing. To enable or disable microphone audio:
- Swipe down from the top-right corner of the screen to open the Control Center.
- Press and hold the Screen Recording button.
- A menu will pop up; tap the Microphone icon to toggle audio recording on or off.
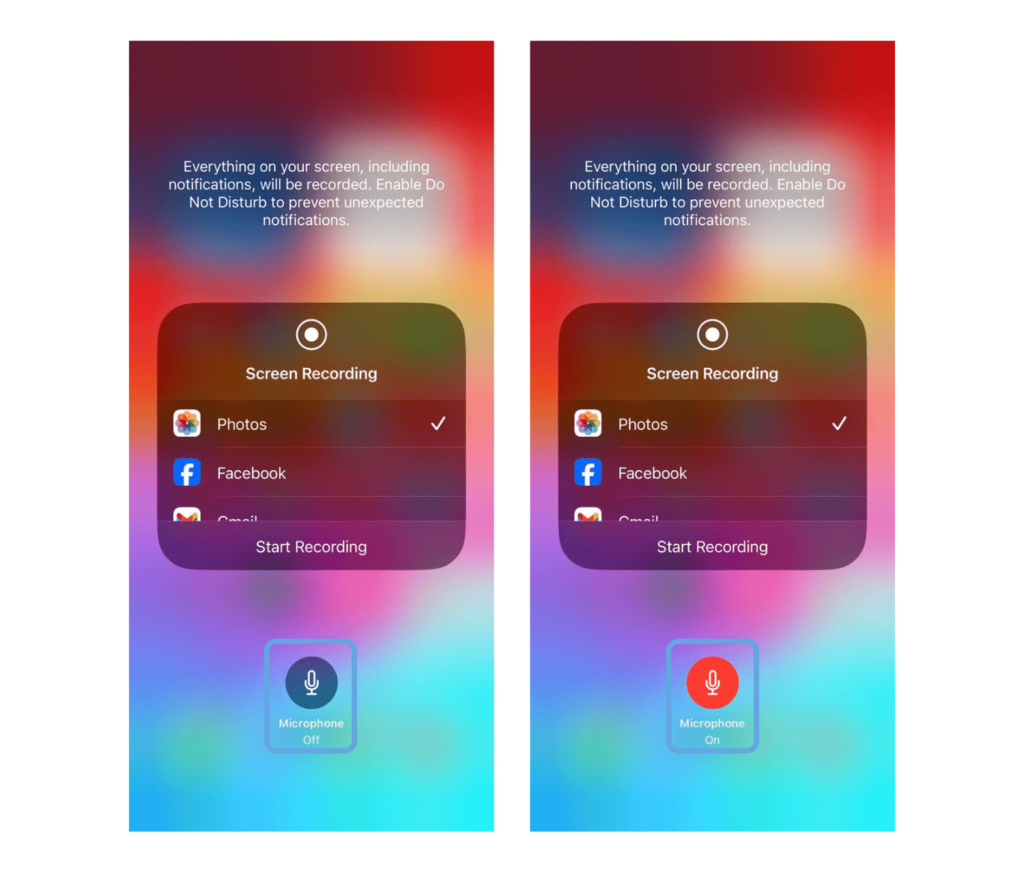
Once your settings are customized, you’re all set to move on to actually recording your screen. Remember, you can always revisit these settings to adjust them according to your needs.
FAQs
Can I Record My Voice While Screen Recording?
Yes, you can record your voice along with the screen. Simply ensure that your microphone is turned on. Long-press the Screen Recording button in the Control Center, tap the microphone icon to turn it on, and then start your recording session.
Why Is There No Sound in My Screen Recording?
If your screen recording doesn’t have sound, it might be because the microphone was turned off. Long-press the Screen Recording button before starting your session and ensure that the microphone icon is red, indicating that it’s on. Also, note that some apps may restrict audio recording for privacy reasons.
Where Are My Screen Recordings Saved?
Once you stop a screen recording, the video is automatically saved to your photo library in the Photos app. From here, you can view, edit, and share it just like any other video or photo stored on your device.
