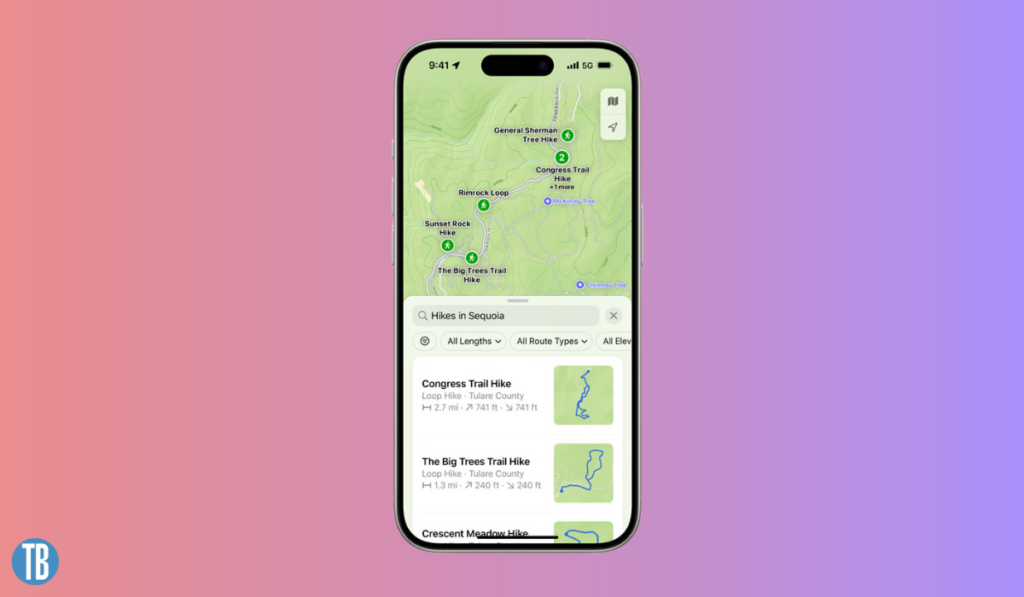
With consistently bringing new upgrades time and again, Apple is ready this fall season, with yet another big update. Apple Maps app is now heard of being upgraded with topographic hiking trails in different versions of iOS.
In this article, you will read :
From iOS 18 to macOS Sequoia, the feature has got a lot to offer. With detailed planning, the ability to save maps, and even in-depth elevation details, the feature has a lot to tell the public.
Read ahead to learn how to use Apple Maps topographic hiking trails.
How to use apple maps hiking trails
In the past few years, Apple has seen expanding Apple Maps and its related features with different and new capabilities. Slowly and steadily, Apple has grown its navigation toolbox and a bunch of other cool stuff.
And that is what they bring this year, in 2024. Apple Maps online is to roll out complete support for topographic hiking trails, with the provision of the completion info you need, everything right there in the app itself. This is new support for all the hikers and runners to search national parks and other marked trails or trailheads right there in Apple Maps conveniently.
Learn how to create custom topographic hiking trail maps on your apple devices
The new feature is supported only in iOS 18, watchOS 11 beta version, or metaOS Sequoia so first, ensure you are accessible to the right version of iOS on your Apple device.
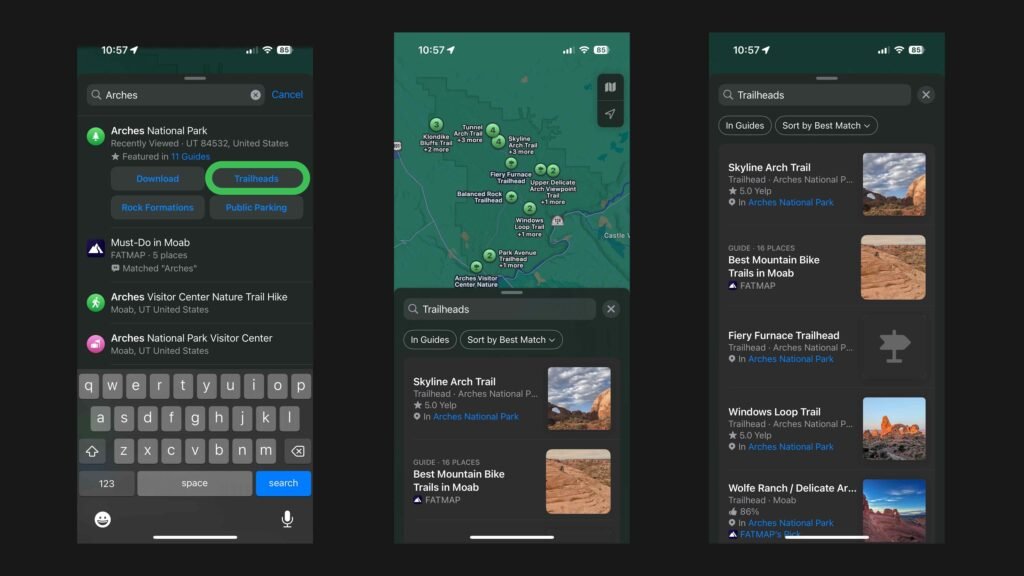
- Search for any trail or some national park that you want to. Please note that all 63 US national parks are shown visible in topographic trail details.
- Look for the Trailheads/ Trail button in the search results. Choose a trail or trailhead.
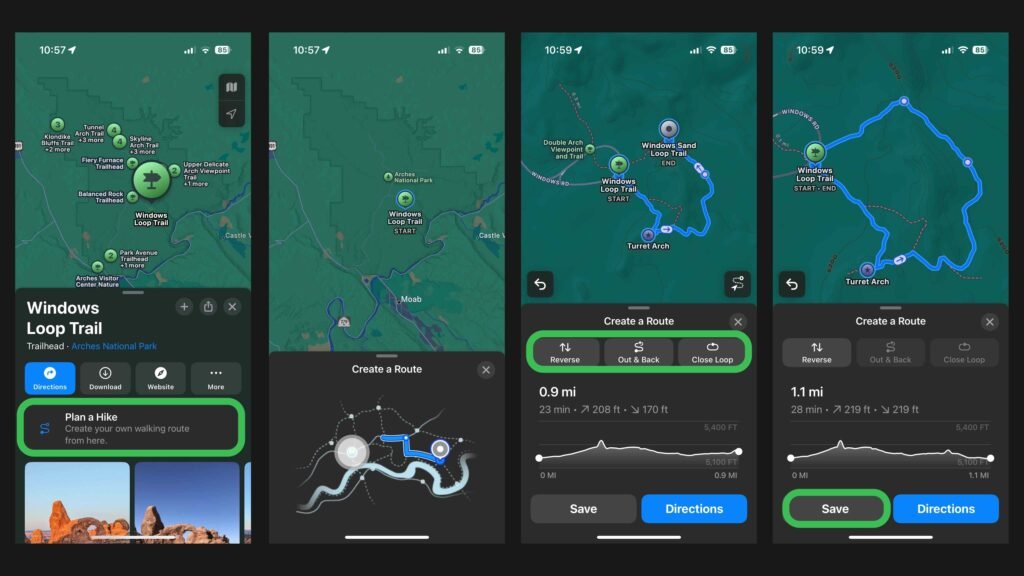
- Now tap on the New Plan Hike Button and click on the screen wherever you’d like to visit.
- It will show you the distance and elevation change next. Now, you can choose to reverse the hike, create an out-and-back map, or even choose to close the loop.
- Once done, choose Save to keep the route. You can also rename it and tap Done present in the top right corner of the screen.
- For guidance, tap Directions and you are ready.
You can find saved trail maps just by tapping on your profile picture in the Apple Maps app. Then click on Offline Maps, and you are done.
Apple maps topographic hiking trails – an exciting upgrade for many
There are different ways in which you can choose a trail and plan your route henceforth. The audience is excited to use these new upgrades by Apple.

Apple uses the ratings provided by Yelp to understand trails better. You can choose your trail choice and further plan a custom route for yourself. One suggestion often provided to everyone who is choosing a trail is to zoom in, on the map after selecting “Plan a Hike” to easily plan their route.

As per the images shown above, you notice that the total distance, duration of the entire hike, elevation change, and other buttons are easily visible and can be operated conveniently in Apple Maps to create your route.
Once you hit “Save”, you will see a notification that shows the route has been saved for Offline use.

To get back to your saved routes in the future, you can directly just tap on your profile picture, go to Offline Maps and here you are, back with your saved routes
Now that you have understood how to use the Apple Maps topographic hiking trail feature, are you excitedly ready to use it or are you still confused about the same?
